
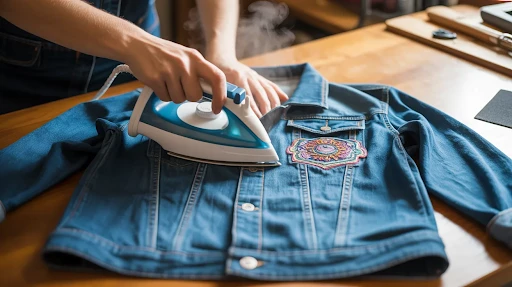
Walk through any Spotlight store across Australia, and you will find a wall of iron on patches with little embroidered shapes covering everything from floral motifs to footy logos. Check the back pockets of any school bag heading into a new term, and you will likely find name patches ironed on by a parent the night before. Ride the train on a Friday night, and the person next to you might be wearing a denim jacket covered in carefully applied anime patches.
Iron on patches are everywhere, and yet the same handful of questions come up again and again. How do you actually get them to stay on? What temperature do you use? Will they survive the washing machine? Can you put them on a polyester jersey without ruining it? And where do you find quality iron on patches in Australia when the Kmart shelves are picked over?
This guide covers everything from the basic mechanics of how iron on patches bond to fabric, through step-by-step application instructions, fabric-by-fabric advice, removal techniques, durability tips, and a clear breakdown of where to buy or order custom iron on patches in Australia in 2026. Whether you are mending old jeans, personalising a school bag, branding a workwear uniform, or ordering a run of patches for a footy club, the answers are here.
In This Guide
|
What Are Iron On Patches?
An iron on patch is a piece of embroidered, woven, or printed fabric with a heat-activated adhesive coating on the reverse side. When you press a hot iron against it, that backing melts, flows into the fibres of your garment, and bonds to them as it cools. When done correctly, the result is a firmly attached patch that can withstand repeated washing.
The technology itself is straightforward: the backing is a thermoplastic adhesive, typically a polyamide or polyester-based hot melt. It stays solid at room temperature, liquefies somewhere between 150–200°C, and re-solidifies once the heat source is removed. The bond strength depends on three things: temperature high enough to fully melt the adhesive, enough downward pressure to push it into the fabric fibres, and sufficient time for the bond to set as it cools.
Types of Iron On Patches Available in Australia
Not every patch sold as “iron on” is the same construction. Here is what you will actually find when shopping for iron on patches in Australia:
| Type | Best For | Durability |
| Embroidered Iron On | Logos, club badges, uniforms | Five Star |
| Woven Iron On | Fine detail, small text, intricate artwork | Four Star |
| PVC Iron On | Outdoor gear, tactical, weather-exposed items | Five Star |
| Fashion / Decorative | Denim jackets, bags, casual wear | Three Star |
| Repair / Mending | Fixing holes in jeans, reinforcing thin fabric | Four Star |
| Letter / Number | Names on bags, personalising clothing | Three Star |
How to Tell If a Patch Is Iron On or Sew On
Flip the patch over. An iron on patch will have a shiny, slightly waxy or plasticky backing that looks and feels like dried glue or a thin laminate. Run your fingernail across it, and it will resist scratching. A sew on patch, by contrast, has a plain fabric back with visible embroidery stitches, it looks just like the back of embroidery hoop work.
Some patches are sold as “both”, they have a light iron on backing for initial placement, but the manufacturer expects you to sew around the edges for a permanent fix. These are common on embroidered iron on patches for school uniforms and workwear.
How to Apply Iron On Patches — Step by Step
Getting this right the first time saves you the frustration of a patch peeling away after its first wash. The most common mistake is treating this like ironing a shirt, gliding the iron across the surface rather than holding it firmly in one position. Iron on patches need to be held, with static pressure, not movement.
What You Will Need
- A household iron (no steam)
- A thin pressing cloth, a cotton pillowcase, a clean tea towel, or a piece of baking paper all work
- A flat, hard surface, a kitchen bench or a wooden cutting board placed on the ironing board is better than a padded ironing board on its own, which absorbs pressure
- The garment, pre-washed and fully dry
Before You StartCheck your garment’s care label. If it says “do not iron” or has a crossed-out iron symbol, put the patch aside and either sew it on or use fabric glue. Fabrics labelled for low-heat ironing only (one dot on the care symbol) need extra caution, see the fabric
| Before You Start
Check your garment’s care label. If it says “do not iron” or has a crossed-out iron symbol, put the patch aside and either sew it on or use fabric glue. Fabrics labelled for low-heat ironing only (one dot on the care symbol) need extra caution, see the fabric |
The Six-Step Application Method
1: Prepare Your Garment
Pre-wash and fully dry the garment before applying any patch. Applying to unwashed fabric risks the patch lifting when the fabric shrinks during its first wash. If working on a tube-shaped garment like jeans or a jacket sleeve, slide a wooden cutting board inside to create a hard, flat pressing surface.
2: Position the Patch
Lay the garment flat and position the patch exactly where you want it, adhesive side down. If placement precision matters, like centring a logo on a chest pocket, use a small piece of masking tape around the edges temporarily, or mark the position lightly with fabric chalk. Once heat is applied, repositioning is difficult.
3: Set Your Iron to the Right Temperature
Turn the steam completely off. Moisture interferes with a dry adhesive bond. For cotton or denim, set to the Cotton or High setting around 180–200°C. For mixed fabrics, drop to Medium. If you are unsure, start lower and increase if the patch does not bond after the full press time.
4: Press from the Front (30–60 Seconds)
Lay the pressing cloth over the patch. Place the iron flat on top and press down firmly with both hands. Do not slide or wiggle the iron. Hold for 30 seconds minimum on thin cotton, up to 60 seconds on thick denim. Most household irons cycle on and off, waiting for the indicator light to confirm you are at full heat before pressing.
5: Flip and Press from the Back — The Sandwich Method
Turn the garment inside out without disturbing the patch. Place the pressing cloth against the fabric directly behind where the patch is sitting. Press again for 30 seconds. This step is the one most people skip, and it is the most important one. Pressing from behind pulls the adhesive towards its heat source, drawing it deeper into the base fabric fibres and dramatically strengthening the bond.
6: Cool Down and Test the Bond
Leave the garment completely flat for at least five minutes. Do not bend, fold, or wear it while the adhesive is still setting. Once cool, gently press one corner of the patch with your fingernail. If it lifts, repeat the full process with more pressure. If it holds, the patch is secure.
How to Apply Iron On Patches Without an Iron
No iron handy? A hair straightener works surprisingly well for small to medium patches. The ceramic plates apply even heat from both sides simultaneously, and you can clamp down with firm pressure. Sandwich the patch between pressing cloths and hold the straightener clamped over it for 20–30 seconds. Move section by section for larger patches.
A heat press machine, the type used for printing on t-shirts, gives the best bond of all methods. If you have access to one (many print shops across Sydney, Melbourne, Brisbane, and other cities offer this as a service), it applies perfectly, with even heat and pressure across the entire patch at once.
What does not work reliably: a hair dryer, boiling water, or pressing with a hot pot. These methods either cannot reach the required temperature or cannot apply the necessary sustained pressure.
Need custom iron on patches designed and made for your team, school, or business?
Iron On Patches on Different Fabrics
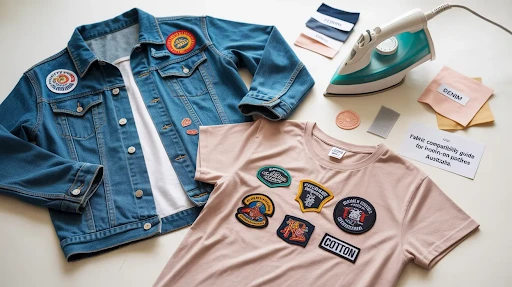
| Fabric | Iron Setting | Approx Temp | Tips | Works? |
| Cotton | High / Cotton | 180–200°C | The ideal fabric excellent adhesive bond | ✓ Yes |
| Denim | High / Cotton | 180–200°C | May need extra pressing time due to thickness; avoid thick seams | ✓ Yes |
| Linen | High / Linen | 200°C | Works well; iron damp and let dry before pressing the patch | ✓ Yes |
| Wool | Medium / Wool | 148–160°C | Use a damp pressing cloth on top; avoid direct heat on delicate wool | ✓ Yes |
| Canvas / Duck | High | 180°C | Great for bags and backpacks; press longer on heavy canvas | ✓ Yes |
| Polyester blend | Low / Synthetic | 110–130°C | Use a thick pressing cloth; test a hidden area first; risk of sheen marks | ⚠ Caution |
| Nylon / Polyamide | Avoid or very low | <100°C | High melt risk at patch-application temperatures; sew on instead | ✗ Not Recommended |
| Waterproof / Technical | Avoid | N/A | Coatings melt and delaminate; the bond also fails on non-porous surfaces | ✗ Avoid |
| Leather / Faux Leather | Avoid | N/A | Heat cracks and discolours leather; use fabric glue or hand-sew | ✗ Avoid |
| Silk / Chiffon | Very Low / Silk | 110°C | Very risky, prefer sewing or fabric glue for delicate silks | ⚠ Risky |
For more details on applying patches to synthetic fabrics and what happens at the fibre level when heat is applied to nylon, see our guide: Iron On Patches on Synthetic Fabrics.
Iron On Denim Patches — Jeans, Jackets, and Shorts
Denim is genuinely the best fabric for iron on patches. Its tight cotton weave gives the adhesive plenty of texture to grip into, and it can handle the high temperatures needed for a strong bond. The main challenge with iron on denim patches is the thickness of a heavy denim jacket or the thigh area of a pair of jeans, which may need 10–15 extra seconds of pressing to ensure the heat fully penetrates.
One thing to avoid: do not position a patch over a bulky felled seam (the thick ridge seam running along the inside leg of most jeans). The uneven surface means parts of the patch backing never make full contact with the fabric, creating weak spots that peel first. Position patches on flat sections of fabric wherever possible.
Repairing holes in jeans with iron on repair patches works particularly well on denim. For a hole, apply one patch on the outside for the visible repair and a second plain patch on the inside as a backing layer. The two layers bond together through the hole and create a durable mend.
Iron On Patches on Backpacks and School Bags
This comes up a lot during the Australian back-to-school season in January and February. Whether you are ironing on iron on name patches to identify a child’s bag or adding decorative patches to a canvas school pack, the approach depends heavily on the bag material.
Canvas and cotton bags, like most primary school bags and tote bags, work just as well as clothing. The challenge is getting a hard, flat surface inside the bag to press against. Slide a wooden board or thick hardcover book into the main compartment so the area you are pressing has solid backing. Without this, the iron pressure just compresses the soft bag interior, and the adhesive does not bond properly.
Nylon backpacks (common in secondary school bags and sports bags) are a different story. The nylon shell will not tolerate the heat required, and the smooth surface does not give the adhesive fibres anything to grip. For these, sew the patch on by hand or use a fabric adhesive specifically formulated for synthetics, such as Beacon Fabri-Tac, available at most Spotlight stores around Australia.
Iron On Patches for School Uniforms and Sports Jerseys
Australian schools have a strong uniform culture, and iron on name patches and badge patches are common across primary and secondary schools in every state. Most school uniforms are a cotton-polyester blend, typically 65% polyester, 35% cotton. This is workable for iron on patches but requires lower heat than pure cotton. Set your iron to Synthetic or Medium and use a thick pressing cloth.
For footy jerseys, rugby, and other sports gear: check the fabric before you try anything. Most modern Australian sports jerseys are made from moisture-wicking performance polyester, which will not tolerate standard iron on application temperatures. If you need to add a Custom Embroidered Patch to a sports jersey, sew it on or take it to a local embroidery or uniform shop. Many of our customers order with a sew-on backing specifically for sportswear applications.
Iron On Patches on Leather — The Short Answer
Do not try to apply an iron on patch directly to leather, faux leather, vinyl, or any similar material. The heat required to activate the adhesive will crack, discolour, or permanently damage the leather surface. There is no temperature workaround here, the problem is not just heat sensitivity, but that leather and vinyl are non-porous, so the adhesive has nothing to bond into, even if the surface survives the heat.
For leather jackets and leather bags, the right approaches are: fabric glue rated for leather (apply the patch, clamp with a book overnight), or hand-sewing around the patch edges with a thick needle and upholstery thread. Our Custom Leather Patches are made specifically for leather goods with appropriate backing options.
How to Remove Iron On Patches
Things change when a patch gets damaged, a logo becomes outdated, or you just decide you want a different look. The good news is that iron on patches are removable, though the process requires patience and the right technique to avoid damaging the underlying fabric.
The Heat Method
The same principle that bonded the patch removes it: reheating the adhesive makes it pliable enough to peel away. Set up your iron with a pressing cloth and apply firm heat over the patch for about 30 seconds, slightly less than you used during application. While the adhesive is still warm and soft, use a pair of tweezers or a butter knife to gently lift one corner and peel the patch back slowly.
Do not yank. If the fabric resists, apply more heat and try again. On thinner fabrics, rushing this step risks pulling threads or leaving a mark in the weave.
Removing Adhesive Residue
Once the patch is off, you will almost always have some adhesive residue left on the fabric, a slightly sticky, shiny patch of dried glue. To remove it:
- Dab a small amount of rubbing alcohol (isopropyl alcohol, available from Bunnings, Chemist Warehouse, or Coles) onto a cotton ball and rub gently in circular motions
- For stubborn residue, a product like Goo Gone fabric-safe adhesive remover, which works well without bleaching most fabrics
- Acetone (nail polish remover) works on some fabrics but can strip colour from dyed fabric, test on a hidden seam first
- After removing the residue, wash the garment normally before wearing it
Can You Re-Apply a Removed Iron On Patch?
Sometimes. If the patch came off cleanly with the full backing intact and no adhesive was left on the fabric, you can re-press it. More often, a removed patch has lost some of its backing. In that case, cut a piece of fusible web tape (available at Spotlight and Lincraft in the haberdashery section, look for brands like Vliesofix or Heat ‘n Bond) slightly smaller than the patch, press it to the back of the patch, peel the paper, and reapply as normal.
How Long Do Iron On Patches Last?
Done properly, a good quality embroidered iron on patch on cotton or denim should survive 30 to 50 machine washes without any intervention. Reinforce the edges with a few hand stitches, and that number climbs well past 100 washes. The patch itself, the embroidery, outlasts the adhesive, which is why the iron-on-then-sew method is worth knowing.
| Application Method | Estimated Lifespan | Wash Resistance | Best For |
| Iron On Only | 1–2 years typical | 30–50 machine washes | Bags, low-movement decorative items |
| Iron On + Corner Stitches | 3–5 years | 100+ washes | Jeans, jackets, active clothing |
| Full Machine Sew On | 5+ years | Near-permanent | Uniforms, workwear, professional use |
| Fabric Glue Only | 6–12 months | Low–Moderate | Leather, nylon, temporary placement |
| Professional Heat Press | 2–4 years | High (80+ washes) | Merch runs, sports teams, bulk orders |
Washing Tips to Make Iron On Patches Last Longer
- Always wash on a cold or cool cycle (30°C maximum), hot water reactivates the adhesive and can cause the patch to shift
- Turn garments inside out before washing. This reduces abrasion on the patch surface
- Use a gentle or delicate cycle setting, not a heavy wash
- Air dry or tumble dry on low heat in a high dryer is the fastest way to loosen an iron on patch
- Do not dry clean without checking with the dry cleaner first, as some solvents dissolve the adhesive
For patches on high-movement areas, such as knees, elbows, and across the seat of jeans, the stretching and compression of fabric repeatedly stresses the adhesive bond at the edges. Adding four anchor stitches (one at each corner) takes about three minutes by hand and changes the lifespan from “it will peel eventually” to “this is basically permanent.”
Pro Tip from Our Workshop
For school uniform patches that need to survive the Australian school year, including PE classes, oval time at lunch, and the inevitable lost-property pile, always use the iron-plus-stitch method. Iron it on to get the position perfect, then have a few minutes with a needle and thread. Every parent who takes this extra step thanks themselves come the end of Term 4.
Where to Buy Iron On Patches in Australia
Spotlight
Spotlight is the best bricks-and-mortar option for decorative and mending patches across Australia. Their haberdashery section typically stocks iron on patches for denim repair, letter and number patches, and seasonal fashion patches. Prices run from around $2 to $8 per patch. The range varies significantly between stores. Larger metro locations in Sydney, Melbourne, Brisbane, and Perth generally carry far more variety than regional stores.
Spotlight also stocks fusible web tape, pressing cloths, and fabric adhesive, making it a good one-stop shop for a patch application project.
Big W, Kmart, and Target
All three carry iron on patches at budget price points, typically $1–$4 per patch or in multipacks. Iron on patches at Big W and Kmart tend towards children’s themed designs (animals, sports, emoji) and basic letter sets. Target sometimes stocks more fashion-forward designs. Stock is inconsistent and turns over seasonally what was there in March may be gone by June.
These are fine for casual decorative use, but the adhesive quality is noticeably lower than that of specialist suppliers. For anything that needs to last, uniforms, workwear, sports gear, they are worth skipping in favour of a dedicated patch supplier.
Lincraft
Lincraft, with stores across Queensland, New South Wales, Victoria, and South Australia, has a reliable range of mending and craft patches in its sewing section. Their iron on repair patches for denim are particularly good value. They also carry the fusible web products you need if you want to convert a sew-on patch to iron-on.
Etsy (Australian Sellers)
Etsy has a strong community of Australian patch makers, particularly for niche designs, anime patches, band patches, hobby and fandom patches, and custom handmade options. Search with the filter set to “Ships from Australia” to avoid long waits from overseas sellers. Prices vary widely but quality from established Australian Etsy sellers is generally good.
Woolworths and Coles
Occasionally stock seasonal craft supplies including basic iron on patches, but they are not reliable sources. If you find them, treat it as a bonus rather than a planned trip.
Custom Iron On Patches Online Suppliers
For branded, personalised, or bulk iron on patches, school badges, club logos, business branding, event merchandise, you need a dedicated custom patch supplier like Custom Patches Australia. This is where the real difference in quality and permanence shows up.
Custom Iron On Patches Made to Your DesignCustom Patches Australia makes fully custom embroidered iron on patches in any size, shape, colour, or design. Free digitising. Free shipping Australia-wide. No hidden fees. |
How to Make Your Own Iron On Patches
Making your own patches at home is genuinely achievable with the right materials, even without embroidery experience. The method you choose depends on the look you are after and what equipment you have access to.
Method 1 — Iron On Transfer Paper (Inkjet or Laser Printed)
This is the most accessible DIY method. You print your design onto iron on transfer paper available from Officeworks, Spotlight, and online, then iron it onto a piece of thick felt or canvas. Cut around your design, apply fusible web to the back, and you have a custom patch ready to apply.
The limitation: printed transfer designs tend to crack and fade faster than embroidered or woven patches, and the surface has a slightly plastic look. Good for temporary patches or crafts, but not for anything that needs to last through repeated washing. Canva is a useful free tool for creating patch designs before printing. Its templates include badge and patch shapes that work well for this purpose.
Method 2 — Heat Transfer Vinyl (HTV)
If you have access to a Cricut, Silhouette, or similar cutting machine, heat transfer vinyl gives you clean, sharp-edged designs in any colour. Cut your design, weed away the excess vinyl, and press onto fabric with your iron. The result is more durable than printed transfer paper and sits closer to the fabric surface, giving a cleaner look.
Method 3 — Hand Embroidery or Machine Embroidery + Fusible Backing
For a proper embroidered patch, embroider your design on a piece of twill fabric or stabiliser, cut it to shape, and iron a piece of fusible web (like Vliesofix) to the back. This produces a patch indistinguishable from a commercially made embroidered iron on patch.
When to Order Custom Rather Than DIY
DIY patches make sense for one-offs, experiments, or craft projects. The moment you need more than 5–10 identical patches, or when the design is detailed (a club logo, a business crest), or when the patches need to be genuinely durable through commercial washing, that is when ordering custom iron on patches in Australia is the better call. The per-patch cost from a specialist supplier often works out cheaper than the materials for a DIY run once you factor in transfer paper, HTV, and the time involved.
Custom Iron On Patches in Australia — Ordering Your Own Design
Custom iron on patches are far more accessible than most people realise. You do not need a complicated design file or a large minimum order to get started. Here is what the process typically looks like:
What to Consider When Ordering Custom Iron On Patches
- Size: Most patches run between 5cm and 12cm at the longest dimension. Larger patches are available and sometimes called “large iron on patches”, these bond particularly well to the back of jackets and the chest of workwear.
- Shape: Standard shapes (circle, rectangle, shield) are most common. Custom die-cut shapes to match your exact logo outline are available but typically add to cost.
- Embroidery coverage: A patch with 75%+ embroidery coverage (most of the surface filled with thread) looks more premium than one where the twill base shows through heavily.
- Border type: Merrow (overlock) border is the standard and gives a clean, finished edge. Laser-cut border works for complex shapes.
- Quantity: Most custom suppliers in Australia have a minimum order of 50 pieces, above which per-patch pricing drops significantly.
Pricing and Turnaround in Australia
Custom embroidered iron on patches in Australia typically range from $2 to $8 per patch depending on size, design complexity, and quantity. Ordering 100+ patches pushes the per-patch price towards the lower end. Turnaround time is typically 10–14 business days from artwork approval to dispatch, with express options available for urgent orders.
Custom Patches Australia supplies custom iron on patches to businesses, schools, clubs, and individuals across Sydney, Melbourne, Brisbane, Perth, Adelaide, Canberra, Darwin, Hobart, and everywhere in between with free shipping on all orders.
For design help: our team includes a free design and digitising service with every order. Send us a sketch, a photo, or an existing file, and we’ll handle the rest, whether you want Custom Embroidered Patches or Custom Woven Patches.
Not sure which patch type suits your project? Our guide on How to Order Custom Patches in Australia walks through every decision you will need to make.
Ready to Order Your Custom Iron On Patches?Free design service. Free shipping Australia-wide. Fast 10–14 day turnaround. From 50 pieces. |
Frequently Asked Questions About Iron On Patches
How do you iron on patches?
Place the patch face-up on the fabric where you want it to sit. Lay a thin pressing cloth, a cotton pillowcase works perfectly over the top. Press a steam-free iron on Cotton or High setting firmly down for 30 to 60 seconds without moving it. Then turn the garment inside out and press firmly from the reverse side for another 30 seconds. Leave flat and untouched for at least five minutes before testing the bond.
Do iron on patches stay on after washing?
Yes, when properly applied to compatible fabrics and washed with care. Wash in cold water (30°C maximum) on a gentle cycle, turn garments inside out, and avoid tumble drying on high heat. A well-applied patch on cotton or denim survives 30 to 50 machine washes without lifting. Adding a few corner stitches pushes that number well past 100.
Can you remove iron on patches?
Yes. Reheat the patch using the same iron-and-pressing-cloth setup from application, pressing for about 30 seconds. While the adhesive is warm and soft, gently peel one corner back using tweezers and slowly work the patch off. Remove any glue residue left on the fabric with rubbing alcohol on a cotton ball, then wash the garment before wearing.
What temperature do I use for iron on patches?
For cotton and denim, use the Cotton or High setting on your iron, roughly 180 to 200°C with steam turned completely off. For polyester blends, drop to Medium or Synthetic (around 110 to 130°C) and use a thick pressing cloth barrier. Never apply iron on patches directly to nylon, waterproof fabrics, or leather at any temperature.
How to apply iron on patches without an iron?
A hair straightener works well for small to medium patches. Sandwich the positioned patch between thin cloths and clamp the straightener firmly over it for 20 to 30 seconds. Move section by section on larger patches. A heat press machine gives the strongest bond of any method. Hair dryers do not generate sufficient consistent heat and are not a reliable substitute.
Do iron on patches work on all fabrics?
No. They work best on natural fibres, cotton, denim, linen, and canvas. They work with caution on wool and polyester blends. They are not appropriate for nylon, polyamide, waterproof or technical fabrics, leather, vinyl, or silk, where the required heat either melts the fabric or the smooth surface gives the adhesive nothing to bond into. For these materials, sew the patch on or use a fabric adhesive rated for the specific material.
Can you sew over an iron on patch?
Absolutely, and it is the best thing to do for anything that needs to last. Iron the patch first to set its exact position, then sew around the perimeter with a straight or zigzag stitch, either by hand or on a sewing machine. This combined method is standard practice for school uniform patches, workwear badges, and sports club patches where washing frequency is high.
How long do iron on patches last?
With proper application to cotton or denim and cold, gentle machine washing, expect 1 to 3 years or 30 to 50 washes for iron-on only. Reinforce with corner stitches and that extends to 3 to 5 years and 100+ washes. The embroidery itself outlasts the adhesive when a patch starts lifting at the edges, a few stitches restore it fully.
Where can I buy iron on patches in Australia?
For ready-made decorative patches: Spotlight has the best craft selection in-store and online, followed by Big W, Kmart, Target, and Lincraft. For custom patches with your own design, logo, or text: Custom Patches Australia makes fully custom embroidered iron on patches with free design service and free delivery across Australia, from Sydney to Perth and everywhere in between.
How do you apply iron on patches to jeans?
Turn the jeans inside out and slide a hard flat surface, a wooden cutting board or a thick hardcover book wrapped in a tea towel inside the leg to the patch area. Turn back to the right side and position your patch. Cover with a pressing cloth and press on high heat for 45 to 60 seconds. Denim’s thickness absorbs more heat than thinner fabrics, so take the full 60 seconds. Flip inside out and press from the back for another 30 seconds, then cool completely.
Can I order custom iron on patches in Australia?
Yes. Custom Patches Australia makes fully custom embroidered iron on patches from your own design, artwork, or logo. Orders start from 50 pieces with a free design and digitising service included. Free shipping covers all of Australia. Turnaround is typically 10 to 14 business days from artwork approval.
Why is my iron on patch peeling off?
The most common causes are insufficient heat, not pressing from both front and back (the sandwich method), pressing on a soft surface that absorbed the pressure, or washing in hot water after application. To fix a peeling patch: clean the area thoroughly, repeat the full application process with firm pressure on a hard surface using both front and back pressing, and let it cool completely undisturbed. Going forward, wash in cold water and air dry.
How do iron on patches work on a backpack?
Check the material first. Canvas or cotton backpacks work well. Slide a hard flat surface inside the bag to the area you are pressing against, position the patch, cover with a pressing cloth, and press firmly for 45 to 60 seconds. Nylon or waterproof backpacks are not suitable for iron on application, as the heat required will damage the fabric. For nylon bags, sew the patch on by hand or use a fabric adhesive rated for synthetics.
Do iron on patches work on polyester?
They can, but with significant caution. Polyester can melt or develop a permanent sheen at the temperatures needed for a strong adhesive bond. If you must apply to polyester, use the lowest iron setting (Synthetic), a thick pressing cloth barrier, and brief contact time. Test on a hidden area of the garment first. For polyester sports jerseys and performance wear, sewing the patch on is strongly recommended instead.
What is the difference between iron on patches and sew on patches?
Iron on patches have a heat-activated adhesive backing that bonds to fabric with a hot iron, no sewing required. Sew on patches have a plain fabric reverse that must be stitched to the garment. Iron on is faster and easier; sew on is more durable and works on more fabric types including synthetics and leather. The most durable result combines both: iron to set position, then sew around the edges.
How to make your own iron on patches?
Three main methods: (1) print your design onto iron on transfer paper from Officeworks or Spotlight, iron onto felt or canvas, cut to shape, and attach fusible web to the back; (2) use heat transfer vinyl cut on a Cricut or Silhouette machine for clean, sharp designs; (3) embroider your design by hand or machine onto twill fabric, cut to shape, and iron fusible web to the reverse. Method 3 gives the most professional result. The Spruce Crafts has a solid step-by-step tutorial on the embroidery approach.
Are iron on patches permanent?
Semi-permanent is the accurate term. The adhesive bond is strong enough to last years through regular washing, but iron on patches can be removed with reheating and careful peeling unlike stitched patches. Adding machine or hand stitching around the edges makes them significantly more permanent and is the standard approach for uniform and workwear applications.
How much do custom iron on patches cost in Australia?
Custom embroidered iron on patches in Australia typically range from $2 to $8 per patch, depending on size, design complexity, and order quantity. Larger orders of 100+ pieces reduce the per-patch cost towards the lower end. Reputable suppliers include the digitising (converting your artwork to embroidery format), setup, and delivery in the quoted price check for these before comparing quotes. Ready-made retail patches from Spotlight, Big W, or Kmart run $1 to $6 each.
How to iron on embroidered patches without damaging them?
Never place the iron directly on the embroidered surface, always use a pressing cloth as a barrier between the iron face and the patch. This protects the raised thread from being flattened or melted by direct contact. Apply heat from the patch side for the first press, then finish with the sandwich method (pressing from the back of the garment), which bonds the adhesive without any direct heat contact with the embroidery at all.
What temp to iron on patches Australia irons vs US irons?
Australian irons run on 230V power (versus 120V in the US and UK), which means Australian irons typically heat faster and can run hotter than their equivalent settings would suggest on imported irons. The fabric setting names (Cotton, Linen, Synthetic) are standardised internationally, so use those as your guide rather than trying to match a specific temperature number. Cotton setting on any Australian-market iron will reach the temperature needed for iron on patch adhesive.
The Bottom Line on Iron On Patches in Australia
Iron on patches done properly are one of the most practical and satisfying ways to personalise clothing, repair worn garments, and brand everything from school uniforms to workwear. The “done properly” part matters. The difference between a patch that lifts after three washes and one that is still sitting firmly in place three years later comes down to four things: compatible fabric, the right temperature, sustained pressure, and pressing from both sides.
For off-the-shelf patches in Australia, Spotlight and Big W will cover most casual needs. For anything branded, personalised, or bought in quantity, custom embroidered iron on patches from a specialist supplier is the right call, both for quality and for price at volume.
Got a project in mind? Whether it is 50 patches for a local footy club, name patches for a school’s lost-property season, or a branded run for a new business, Custom Patches Australia are happy to help you figure out the right patch type, size, and backing for your specific use.
Get Your Custom Iron On Patches Made in AustraliaFree design service. Free digitising. Free delivery across Australia. Turnaround from 10 business days. |