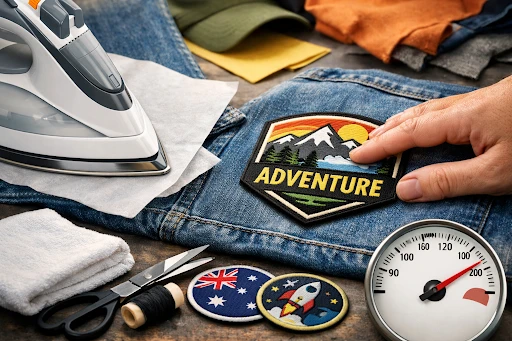
If you are wondering how to iron on patches without making a mess of things, it all comes down to what you have between the two surfaces. The last thing you would ever do is place the raw face of your iron directly against the embroidery itself, as well as the fabric itself.
You need something as a barrier, which can come in the form of a thin piece of cotton material, like a pillowcase, or parchment paper. Place the patch where it needs to go by ensuring that it is properly measured out first, then simply place the material on top of it.
Refined Techniques for Long-Lasting Results
However, after completing this process, most individuals believe that they are done, but the next important step in knowing how to iron a patch comes. After pressing the front portion of the cloth, gently turn your garment inside out.
Applying heat from the opposite side is essential in ensuring that the bond between the two fabrics remains unbreakable for many years to come. Through applying pressure from the rear part of the fabric, where the patch is situated, you ensure that the glue draws itself through to the point of origin of the heat.
It acts like a “sandwich”, thus providing a stronger bond between the two fabrics. You should now apply heat to the opposite side of your garment for another thirty seconds and then allow the piece of clothing to rest flat. This is the most challenging step because you are not supposed to touch the fabric until it has cooled down completely.
Decoding The Backing To Know What You Are Dealing With
Before you even think of plugging in your iron, there is some detective work you need to do on your new acquisition. First, one challenge you might have as a novice patch collector is determining how to tell if a patch is iron on rather than the more common sew-on patch.
You may be tempted to think that all designs are suitable for ironing, but nothing could be further from the truth. The trick to telling the two apart is in the back. Simply turn the patch around and take a good look.
While the back of most sew-on patches is usually made of fabric, with the embroidery stitches clearly visible, iron-on patches will have a different back altogether. This one will either be shiny or plasticky looking and completely cover the whole
embroidered patch.
This is the substance that will act like glue when it gets hot. When you run your fingers over this kind of backing and it feels hard and glossy, like dried glue or laminate, you have found yourself a gold mine.
Also, the material of the fabric chosen that the patch will attach to needs to be strong enough to handle the heat from the iron. Materials like
nylon may not handle iron-on patches well and can melt or warp.
Mastering the Art of Iron-On Denim Patches
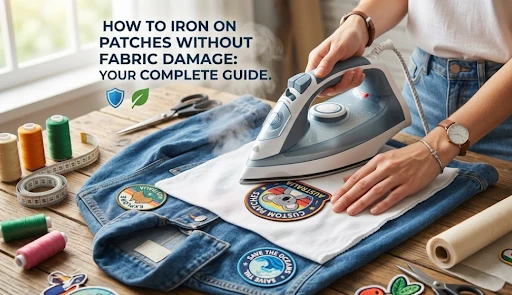
Denim, without a doubt, is one of the most emblematic canvases in Australia for customising clothing items. Be they old 501 jeans or a favourite denim jacket, iron on denim patches can easily be glued to the garment because the rough texture of cotton cloth allows the patch to stick to the fabric perfectly.
Nevertheless, sometimes denim is quite thick, meaning that it needs some more attention and care. Due to multiple layers of thick fabric, it may take you a couple of additional seconds to apply a patch than it takes to put one onto a thin shirt, for instance.
Do not place a patch over a thick felled seam. Otherwise, you will need to press the patch with the tip of your iron to make sure that every tiny millimetre of the patch backing gets heated equally.
Navigating the Delicate Nature of Synthetic Fabrics
The first challenge that many amateurs will encounter when applying patches is determining how to tell if a patch is iron on type or the regular type that needs sewing. Denim, while durable, is not the only fabric used.
It is important to be extremely careful when using nylon, polyester, or jerseys. These types of fabrics are synthetic and consist of plastic. As a result, they can also melt when exposed to the heat required to melt the glue necessary for securing the patch.
When you attempt to master the art of how to iron on a patch on synthetic blends, you should do everything with the utmost care because, otherwise, you can damage your material. Sometimes, it becomes safer to lower the heat of the iron and increase the amount of contact between it and the surface. However, it will require greater effort.
In case you see that the material melts and changes its consistency, you should stop the whole operation. The use of the hybrid method in such situations would prove helpful: first, iron the patch and then sew it on.
What to Do if You Do Not Have an Iron Handy
Life goes on. You may be in your dorm room or at the music festival and realise that you must repair a worn seam or decorate a little more, yet there is no sunshine to be seen.
Knowing how to iron on a patch without an iron using only a hair straightener is a helpful skill to have in life. This is because you will still require heat and pressure for the patching to happen effectively.
A hair straightener is actually a perfect option for applying small patches. This is due to the fact that a hair straightener offers heat from two sides while at the same time giving you the opportunity to clamp on with great pressure.
However, you should ensure that you still have some barrier between your fabric and the ceramic plates of your hair straightener, such as cloth. In extreme cases, a hot metal pot can be used as a pressing tool.
Correcting Mistakes and Removing Old Designs
Things evolve, and at times, you may wish to revamp yourself. With a retro sport shirt in your possession with a
woven patch, you may wish to find out how to remove an iron on patch from a jersey without leaving sticky glue marks.
It is pretty much the same procedure, only backwards. You will have to re-melt the bonding agent into a fluid state. Place your iron back into play along with the pressing cloth and warm up the patch area completely.
After the bonding agent is sufficiently softened, you may start pulling off the adhesive tape bit by bit at the edge of the cloth using tweezers. However, do not pull too hard, or else you would rip your delicate knit jersey.
If there is any glue remaining on your garment, it should be removed using rubbing alcohol or an adhesive remover that you can apply using a Q-tip or cotton ball.
Troubleshooting Common Issues and Success Tips
In case your iron on patches how to efforts have not proved to be successful, do not worry. In this case, the most frequent reason lies in insufficient heat or pressure. Household irons can be quite temperamental, and their sensors tend to turn on and off quite regularly.
If your patch is not getting stuck, wait until the iron’s indicator turns on twice, indicating that you will get the optimal heat. There is one more trick that you should keep in mind. Your ironing board might be soft, which works great when dealing with shirts.
When applying patches, however, it can make it difficult to apply sufficient pressure to the surface. It is recommended to put a wooden cutting board or towel on the kitchen table.
The Philosophy of the Perfect Press
In summary, the application of iron patches is both art and science. This is about turning the factory-produced material into something personal. Whatever the case, whether it is mending a rip on your prized pair of work pants or dressing up your backpack before hitting the Australian Outback trails, taking the time to do it right shows how much you value your things.
There is nothing quite like the feeling of satisfaction associated with the sound of a successfully applied patch fitting snugly and becoming part of the clothes as opposed to sitting on top. Following the process and observing your fabric’s limitations will ensure you get excellent results.
Frequently Asked Questions
Can I iron a patch onto leather or waterproof raincoats?
Using an iron on leather or waterproof materials is unadvised, as high heat can cause shrinkage, discolouration, or cracking. Waterproof coats may melt under iron’s heat. It is safer to use fabric glue or sew patches manually to prevent damaging costly gear.
Why is the patch peeling at the corners after a wash?
Peeling patches may occur due to insufficient heat penetration or washing in hot water. To resolve this, re-apply heat using the “sandwich” method or add a small drop of fabric glue under the corner. For prevention, wash patched items on a cold, gentle cycle and avoid tumble drying, as the dryer’s high heat can reactivate glue, causing it to shift.
Is it possible to iron a patch onto a very thin t-shirt?
Yes, you can, but be careful. Thin cotton t-shirts may show “ghosting” from patches. Use a lower heat setting and a thick pressing cloth for even heat distribution. Iron from the back to ensure the glue adheres to the limited fibres effectively.
How long do iron-on patches actually last?
When properly applied with the front-and-back heating method, high-quality patches can endure for years. Yet, on high-movement garments like leggings, the constant stretching may weaken the glue. To enhance longevity, adding “anchor” stitches in the corners is advisable for these stress areas.
Ready To Start Your Next Creative Project?
Now that you have mastered the techniques of how to iron on a patch without ruining your gear, it is time to put into use the skills you have learned! Whether you decide to design one single patch for yourself or a large quantity for your team, we are here to assist you in creating the unique custom patch according to your vision.
The greatest thing about being a part of the DIY culture in Australia is our philosophy to “give it a go”. Though the technicalities of how to iron on patches may be rather intimidating at first, it is an endeavour that will surely pay off in the end. Each patch you put on your fabric holds a unique history about yourself.
Custom Patches Australia will provide you with premium embroidery and reliable glue to endure the rough weather in Australia. Do not settle for anything ordinary. Instead, turn your clothing unique with the custom patches! Come and explore our gallery, receive a complimentary quote, and get down to creating a masterpiece together!