
Whether you’re customising a denim jacket, branding a club uniform, repairing worn jeans, or expressing your style through embroidered art, sew on patches are one of the most durable, versatile, and visually impactful ways to do it.
This guide covers everything: types, techniques, fabrics, placement, custom ordering, and the most-asked questions Australians search for before picking up a needle and thread.Sew on patches have been used for decades across fashion, military, sports clubs, motorsports, and the arts.
Unlike trends that come and go, the appeal of a beautifully stitched patch on a garment is timeless and demand for custom sew on patches in Australia has never been higher. Let’s dive in.
What Are Sew On Patches?
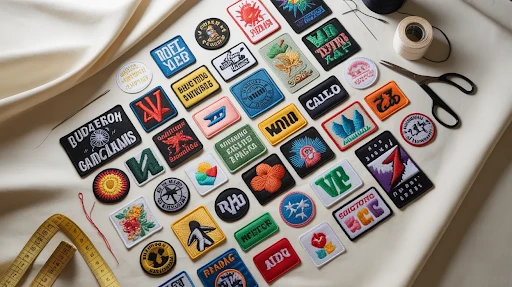
Sew on patches are fabric-backed decorative or functional pieces — usually embroidered, woven, or printed that are attached to clothing, bags, hats, or accessories by stitching them directly onto the base fabric. Unlike iron on patches, they have no heat-activated adhesive backing and rely entirely on thread for attachment, making them significantly more durable and long-lasting.
A sew on patch typically consists of:
- A design layer
embroidered thread, woven jacquard, printed fabric, or PVC/rubber
- A base fabric
twill, felt, canvas, or mesh merrowed at the edges
- A border
usually a merrowed (overlock-stitched) edge or a laser-cut heat seal edge
The term “sew on” refers to the attachment method rather than a single patch type. Any patch embroidered, woven, leather, sequin, or printed can come as a sew on variety when manufactured without iron on glue backing.
Types of Sew On Patches
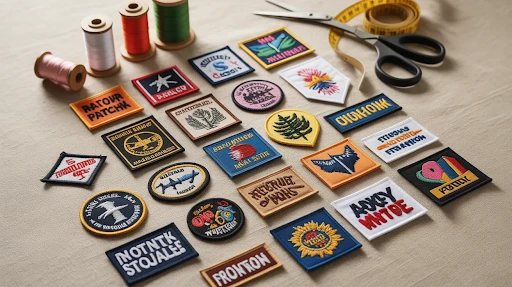
The type you choose affects how the finished patch looks, how long it lasts, and which fabrics it suits best. Here’s a breakdown of every wide variety:
| Patch Type | Construction | Best For | Durability | Detail Level |
| Embroidered Sew On | Stitched thread on twill base | Logos, crests, names, clubs | Five star | Medium–High |
| Woven Sew On | Thin woven jacquard fabric | Fine text, detailed graphics | Five star | Very High |
| Printed / Sublimated | Dye-sublimated onto fabric | Photo-quality, complex art | Three star | Photographic |
| PVC / Rubber Sew On | Moulded soft PVC | Tactical, outdoor, military | Five star | 3D relief |
| Leather Sew On | Debossed or printed leather | Biker vests, premium fashion | Four star | Medium |
| Felt Sew On | Cut felt, often layered | DIY, crafts, kids clothing | Three star | Low–Medium |
| Sequin Sew On | Sequins on mesh/fabric | Fashion, costumes, dance | Three star | Visual sparkle |
| Chenille Sew On | Looped chenille on twill | Varsity/letterman jackets | Four star | Bold, textured |
| Reflective Sew On | Reflective material backing | Hi-vis workwear, cycling | Five star | Functional |
| Name Tape / Label Patches | Woven or embroidered narrow tape | Uniforms, school, military | Five star | Text only |
Pro Tip: For logos with fine text and gradients (like a detailed football club crest), woven patches will capture the detail better than embroidered. For bold designs with solid fills, embroidered patches look richer and have a premium three-dimensional texture.
Sew On Patches vs Iron On Patches: Which Is Better?
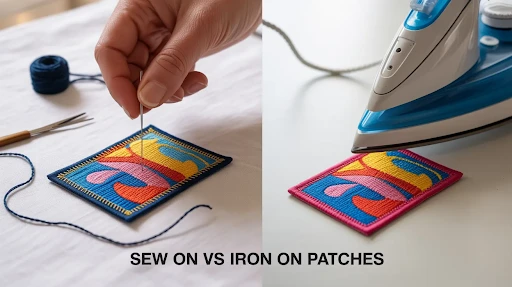
Are sew on patches better than iron on?
Sew on patches are more durable and permanent. Iron on patches are faster to apply but can peel over time, especially through repeated hot washing. For uniforms, workwear, jackets, and any application where the patch must last years, sew on is the better choice. For temporary styling or low-wash items, iron on is convenient.
| Factor | Sew On Patches | Iron On Patches |
| Durability | Permanent lasts the life of the garment | Can peel after repeated washing |
| Ease of Application | Requires needle, thread & time | Quick iron on in 30–60 sec |
| Works on Nylon/Polyester | Yes, with the correct needle | No heat can melt synthetic fabrics |
| Works on Leather | Yes, with a leather needle | No iron damages leather |
| Wash Resistance | Machine-wash safe indefinitely | May delaminate in hot water |
| Removable/Repositionable | Permanent (seam unpicking needed) | Can sometimes be peeled off |
| Best Use Case | Uniforms, workwear, military, bikers | Fashion, casual clothing, kids |
| Professional Finish | Cleaner edge, more structured | Can bubble or lift at edges |
Can you sew on iron on patches?
Yes, and it’s actually a recommended best practice. Many patch professionals iron the patch first to lock it in position, then sew around the border for permanent attachment. This two-step method prevents the patch from shifting during stitching and gives you a precise, professional result. So the two methods aren’t mutually exclusive; they work beautifully together.
How to Sew On Patches by Hand — Step-by-Step
Hand sewing a patch is satisfying, forgiving, and requires no special equipment beyond a needle and thread. It’s perfect for curved seams, tight spots, and thick materials like denim and canvas.
What You’ll Need
- Embroidery or upholstery needle (or a denim needle for thick fabric)
- Thread matching the patch border colour (polyester is best)
- Scissors and small snips
- Pins, sewing clips, or a small amount of fabric glue / double-sided tape
- Thimble (recommended for denim and canvas)
- Chalk or fabric marker to mark the position
1. Mark the PositionUse chalk or a removable fabric marker to outline exactly where the patch will sit. Measure from reference points (seams, centre lines) for symmetry. Step back and check visually before committing. |
2. Secure the Patch TemporarilyPin the patch at each corner and midpoint, or use a few small dots of fabric glue. For iron on patches, you can press them lightly first to hold position without committing to full adhesion. |
3. Thread Your Needle & Knot the EndCut 50–60 cm of thread. Thread the needle and pull through until you have a double strand (fold the thread in half and thread both ends through). Tie a sturdy knot at the tail end. A double strand adds strength without extra passes. |
4. Begin the Whip Stitch (or Blanket Stitch)Push the needle up through the base fabric from underneath, catching the very edge of the patch. Pull through completely. Then bring the needle back over the patch edge and push up through the base fabric again, spacing 2–3 mm along the border. The thread wraps over the patch edge in a repeating loop, this is the whip stitch. For a decorative finish, use a blanket stitch instead. |
5. Maintain Even SpacingTry to keep stitches 2–3 mm apart and at a consistent depth. Going too shallow only catches the patch surface; too deep pulls the fabric. Consistency matters more than perfection, uneven stitches are barely visible once the patch is on. |
6. Work Around Curves & CornersAt sharp corners, take an extra stitch to reinforce the point. On curves, slightly shorten your stitch spacing to keep the edge flat and secure. This prevents gaps where the patch edge might lift over time |
7. Secure the Finish & TrimWhen you return to where you started, pass the needle back through 2–3 previous stitches to lock the thread, then run a small knot under the base fabric. Clip the thread close. Remove any visible pins. |
8. Check Edges & PressGently tug the patch to confirm it won’t lift. Lightly press with an iron (if the fabric allows) or a damp cloth to flatten any puckering from tension. Your patch is now permanently attached. |
How to Sew On Patches with a Sewing Machine
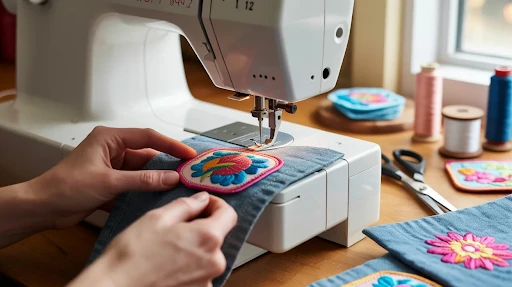
A sewing machine makes patch application faster and stronger. Most home sewing machines handle patch attachment well with the right needle and foot.
Machine Settings & Preparation
- Needle: Use a denim needle (size 90/14) for thick fabrics; a universal needle (80/12) for light to medium fabrics
- Stitch: Straight stitch (length 2.5–3 mm) is the simplest, a zigzag stitch over the patch edge gives extra security
- Thread: 40-weight polyester in a colour matching the patch border
- Foot: Standard presser foot works; an open-toe foot gives better visibility at the edges
- Speed: Slow, especially on corners
1. Pre-position the PatchPin or use double-sided tape to hold the patch firmly in place before it goes under the machine. Loose patches shift with the presser foot pressure. |
2. Start at a Flat EdgeBegin sewing at the middle of one straight side, not at a corner. Lower the needle into the fabric first to anchor the position, then lower the presser foot. Backstitch 3–4 stitches at the start to lock the thread. |
3. Stitch 2–3 mm Inside the Patch BorderFor a straight stitch, run the stitch line 2–3 mm in from the outer edge of the patch. This catches both the patch and the base fabric securely. Keep the patch edge lined up with your presser foot as a guide. |
4. Pivot at CornersAt corners, stop with the needle down in the fabric, lift the presser foot, rotate the fabric 90°, lower the foot, and continue. Take your time, rushed corners create skipped stitches and misalignment. |
5. Overlap the Starting PointSew 4–5 stitches past where you started, then backstitch to lock. Clip threads close to the fabric. For extra durability, do a second pass further in from the edge (6–8 mm in) to create double-stitching. |
How to Sew Patches on Hats by Machine
Structured caps are tricky because you can’t lay them flat. Options include using a specialty hat-holder/jig, free-arm sewing around the crown, or using a sewing awl to hand-stitch through the front panel while the cap is in your hand. For flat-panel snapbacks and beanies, the process is similar to a standard garment, just stuff the hat with tissue paper to give the fabric body under the presser foot.
Watch Out
On jeans with a thick seam intersecting the patch, your machine needle can break when crossing the seam. Slow to the slowest speed and manually turn the handwheel stitch by stitch over the thickest part.
Sewing Patches on Different Fabrics — A Complete Guide
The fabric you’re attaching to is just as important as the patch itself. Here’s exactly what to do (and what not to do) for every major material.
DENIM & JEANS
The classic pairing. Use a denim needle and heavy polyester thread. For knee patches on jeans, turn inside out for repair patches; work from the right side for decorative patches. Best stitch: straight or running stitch near the border.
LEATHER & BIKER VESTS
Never iron leather. Use sewing clips (not pins, which leave holes). A leather needle and bonded nylon thread are essential. Pre-glue with leather cement for positioning. Hand stitching gives better control than machine stitching on thick hides.
JACKETS (COTTON/CANVAS)
Canvas and cotton twill take needle and thread easily. Both machine and hand work well. A double stitch row adds longevity for patches on high-wear areas like shoulders and upper arms.
BACKPACKS & BAGS
Most backpack fabrics (Cordura nylon, polyester) won’t accept iron-on adhesive sewing is the way to go. Use a sharp needle, compact stitches (2 mm), and if the bag has foam/padding inside, stuff the sewing area with cardboard to give the needle something firm to push against.
HATS & CAPS
Flat beanies work fine in a standard machine. For structured baseball caps, use the free arm or hand-sew with a curved needle. Stick to patches under 8 cm for caps to ensure they lie flat against the panel curve.
UNIFORMS & SHIRTS
Military, workwear, and school uniforms typically require patches on sleeves and the chest. Use a stabiliser on the inside of the shirt fabric to prevent puckering. Polyester uniforms use a sharp needle and low heat when pressing.
NYLON (PACKS, RAIN GEAR)
Iron-on patches won’t bond to nylon, making sewing your only real option. Nylon is slippery, use sewing clips and go slow. A walking foot on your machine prevents the fabric from feeding unevenly.
KNITWEAR & SWEATERS
Knits stretch, so always use a stabiliser or iron-on interfacing behind the patch area before sewing. A ballpoint needle prevents splitting the knit fibres. Elbow patches on sweaters and blazers are the classic application here.
How to Sew Patches on a Leather Motorcycle Jacket or Biker Vest
This is one of the most commonly searched techniques, so let’s go deeper. A leather motorcycle jacket is typically 1–3 mm thick, well within the capability of a domestic sewing machine with the right needle, but manageable by hand with patience.
- Position and glue first: Apply a thin layer of leather cement or Barge contact cement to the back of the patch. Press into position and let it tack up for 10 minutes. This is essential stitching, without adhesion, the patch will shift.
- Use a stitching groover (optional): A stitching groover tool cuts a shallow channel in the leather for the thread to sit in, creating a professional, flush finish.
- Saddle stitch by hand for strength: Thread two needles on a single piece of waxed thread and work from both sides through the same hole. This is the saddle stitch, used by leather craftspeople for centuries. It’s almost impossible to unravel, even if one stitch breaks.
- Space holes with a pricking iron: A leather pricking iron (or awl) punches evenly-spaced holes 3–4 mm apart before stitching, giving you a clean, consistent line.
Where to Place Sew On Patches Placement Guide
| Garment | Common Placement Positions | Notes |
| Denim Jacket | Back panel (centred), left chest, sleeves, collar | Back patch should be at least 15 cm below the collar; sleeves look great in rows |
| Jeans | Knee (interior repair), thigh, back pocket, cuff | Iron on denim patch inside for invisible knee repair; decorative on the outside |
| Biker Vest (Kutte) | Full back (MC patch), top/bottom rockers, left breast (MC name), right breast (rank), collar, side panels | MC vest placement follows strict club rules. Check with your club |
| Letterman Jacket | Left chest (school letter), left sleeve (achievements), right sleeve (year), back (sport) | Traditional academic layout; modern styling is more freeform |
| Backpack | Front pocket face, top strap, side panel | Avoid sewing over seams for the cleanest result |
| Military / Work Uniform | Upper sleeve (unit/flag), chest (name tape), shoulder (rank) | Military placement follows strict regulations by branch and rank |
| Cap / Hat | Front panel centre, side panel, rear strap area | Keep patches under 8 cm wide for the front panel flat fit |
| Shirt / Polo | Left chest (logo/name), right sleeve (flag or brand) | Use a stabiliser behind lightweight shirt fabric |
Where to Sew Patches on a Letterman Jacket
The traditional American varsity layout is: the school or college letter on the left chest, sport/achievement patches on the left sleeve in vertical rows, graduation year on the right sleeve, and a large patch or number on the back.
In the Australian context, school formal jackets, footy club jackets, and TAFE/uni varsity wear follow similar conventions, though placement is generally freer. When in doubt, symmetry and balance look best.
Custom Sew On Patches Australia — Your Complete Ordering Guide
If you need personalised sew on patches for a club, team, business, school, or event, or you want something that simply doesn’t exist off the shelf, custom is the way to go. Here’s everything you need to know before you order custom patches.
What Can Be Customised?
- Shape: Round, rectangle, shield, custom die-cut (any shape)
- Size: From small 3 cm badges to large 30 cm+ back patches
- Thread colours: Up to full Pantone-matched embroidery thread colours
- Backing: Sew on (plain), iron on, velcro, or both iron on + sew on
- Border: Merrowed edge, heat cut, laser cut, folded edge
- Text & Names: Names, numbers, slogans, serial numbers
- Logo or artwork: Upload your file (AI, EPS, PDF, high-res PNG)
Popular Custom Sew On Patch Applications
| Application | Typical Type | Common Size | Key Feature |
| AFL / Football Clubs | Embroidered | 8–12 cm | Club colours, crest |
| Workwear / Hi-Vis | Embroidered or Woven | 10–14 cm name tape | Company logo + name |
| Military / Defence | Embroidered / PVC | 8–10 cm | Unit insignia, flag patch |
| School Uniforms | Woven or Embroidered | 6–9 cm | School crest, house badge |
| Motorcycle Clubs (MC) | Embroidered (3-piece set) | Back: 25–30 cm | Top/bottom rockers + centre |
| Cycling Clubs | Woven or Reflective | 6–8 cm | Club logo, reflective elements |
| Bands & Music | Embroidered | 9–12 cm | Band logo, tour year |
| Scouting / Youth Groups | Embroidered | 5–8 cm | Activity badges, district crest |
| Fashion / Streetwear | Embroidered / Chenille | 7–15 cm | Brand logo, custom art |
| Events / Conferences | Woven | 5–7 cm | Event name, year, logo |
Ordering Tips: When ordering custom sew on patches: (1) Provide vector artwork (AI or EPS) for the sharpest results, PNG at 300dpi minimum. (2) Specify whether you want sew on, iron on, or velcro backing when you enquire. (3) Order at least 10–20% more than you need to cover losses and future replacements. (4) Request a digital proof (or physical sample for large orders) before approving full production.
| Order Custom Sew On Patches — Made in Australia:
From small runs for individuals to bulk orders for clubs, businesses, and military units, Custom Patches Australia delivers premium quality, fast turnaround, and free artwork assistance on every order. Get a Free Quote Explore Options |
Where to Buy Sew On Patches in Australia
There are several ways to source sew on patches in Australia, depending on whether you need ready-made stock patches or fully custom designs.
| Source | Best For | Custom? | Notes |
| Custom Patches Australia | Custom & bulk orders, clubs, uniforms | Yes | Free artwork, fast turnaround, AU-based |
| Spotlight | Craft & DIY, ready-made designs | No | Decorative fashion patches in store |
| Lincraft | Craft & fabric stores | No | Good for repair & functional patches |
| Etsy Australia | Unique, artistic, small-batch | Some sellers | Wide variety; quality varies by seller |
| Amazon AU | Standard designs, bulk packs | No | Fast delivery; mostly imported stock |
| Kmart Australia | Budget fashion patches | No | Limited stock; trendy seasonal designs |
| Military Surplus Stores | Military insignia, flag patches | No | Brisbane, Sydney, Melbourne locations |
| Local Embroidery Shops | Small custom runs, local service | Yes | Search “sew patches near me” |
Sew On Patches Brisbane, Sydney, Melbourne & Beyond
If you’re searching for “sew on patches near me” in Brisbane, Sydney, Melbourne, Perth, or Adelaide, Custom Patches Australia ships Australia-wide with fast dispatch. For same-day physical shopping, Spotlight and Lincraft branches in most major cities stock a range of decorative and repair patches. For custom work in your city, search your local business directory for embroidery or uniform shops.
Care & Maintenance for Garments with Sew On Patches
One of the biggest advantages of sew on patches over iron on patches is their wash resilience, but there are still best practices for keeping patched garments looking great.
- Turn garments inside out before machine washing. This reduces friction on the patch surface and protects embroidery thread from pilling
- Cold to warm wash (30–40°C), hot water won’t damage the stitching, but can fade the thread colour over time
- Avoid tumble drying on high heat, lay flat or hang dry; heat won’t damage the stitching, but can cause the base fabric to shrink around the patch, causing puckering
- Dry-clean leather garments, water can damage the hide. Check with your dry cleaner about patch safety
- If a thread comes loose, re-stitch immediately, a single broken stitch won’t cause the whole patch to come off, but it creates a starting point for unravelling
- Iron over patches with a pressing cloth. Direct iron contact can scorch embroidery thread; always use a protective cloth or iron from the inside
Long-Term Care
Embroidered sew on patches sewn with polyester thread will outlast the garment they’re on in most cases. The limiting factor is almost always the base fabric (denim fading, canvas wearing through), not the patch itself. A well-sewn patch is virtually forever.
Popular Sew On Patch Styles in Australia (2026)
Australia has a rich patch culture spanning bikie clubs, football codes, military history, and a thriving DIY fashion scene. Here are the styles driving demand right now:
| Style / Category | Examples | Where Applied | Trend Level |
| AFL Club Patches | Collingwood, Richmond, Eagles crests | Jackets, scarves, bags | High |
| Vintage & Retro Patches | 70s/80s logos, old-school brands, sunset scenes | Denim, jackets | Very High |
| Motorcycle Club (MC) Patches | Back rockers, 3-piece sets, chapter patches | Leather vests & jackets | High |
| Australian Flag & Patriotic | Aus flag, Southern Cross, digger insignia | Hats, shirts, bags | Steady |
| Band & Music Patches | Rock bands, festival logos, tour merch | Denim jackets, vests | High |
| Harley-Davidson Patches | Bar & shield logo, HOG chapter badges | Leather, denim | Steady |
| Military & Army Patches | ADF unit badges, US Army, ANZAC insignia | Uniforms, tactical gear | Steady |
| NASA & Space | NASA worm logo, mission patches | Jackets, packs | High |
| Floral & Botanical | Waratahs, wattles, tropical florals | Shirts, jeans, bags | Growing |
| Custom Name & Logo | Business logos, personal monograms | Workwear, hats, uniforms | Very High |
Frequently Asked Questions
Below are the most commonly searched questions about sew on patches in Australia, answered in full.
Are sew on patches better than iron on patches?
Sew on patches are significantly more durable than iron on patches. Iron on patches rely on a heat-activated adhesive backing that can weaken or peel after repeated washing, especially under high heat or heavy use. Sew on patches are stitched directly into the garment, which keeps them secure through regular wear, laundering, and outdoor conditions.
For uniforms, motorcycle vests, military apparel, sports gear, and workwear, sew on patches are usually the better long-term option. Iron on patches are faster to apply and work well for lightweight fashion garments or occasional use.
Can you sew on iron on patches?
Yes. Many people use iron on patches as sew on patches for added durability. The adhesive backing helps hold the patch in place while stitching, making the sewing process easier and more accurate. Once stitched around the edge, the patch becomes far more secure than relying on adhesive alone.
What is the easiest way to sew on patches by hand?
The whip stitch is one of the easiest methods for beginners. It involves looping the thread around the patch edge repeatedly while stitching through both the patch and garment. It is simple, strong, and works well for most fabrics. A running stitch is another easy option, although it may not be as durable for heavy-use garments.
Can sew on patches be attached to polyester or nylon?
Yes. Sew on patches work very well on polyester and nylon fabrics, especially because iron on adhesives often struggle to bond properly with synthetic materials. Using polyester thread is recommended since it stretches similarly to synthetic fabrics and handles washing better.
How do you sew patches onto leather or biker vests?
Leather requires heavier needles and stronger thread than standard fabric. Most people use leather needles with bonded nylon or polyester thread. Instead of pins, clips or temporary leather adhesive is recommended because pins leave permanent holes in leather. Sewing patches onto biker vests by hand is common for better control and durability.
What is the best stitch for sewing on a patch?
For hand sewing, whip stitches and blanket stitches are the most popular because they are durable and visually clean. For machine sewing, a straight stitch around the patch border gives a professional finish, while zigzag stitching offers additional strength.
How long does it take to sew on a patch?
A small patch usually takes around 15–30 minutes by hand and only a few minutes by sewing machine. Larger patches, such as back patches on biker jackets, can take over an hour depending on the fabric and stitching method.
Do dry cleaners or tailoring shops sew on patches?
Yes. Many alteration shops, dry cleaners, embroidery stores, and tailoring businesses in Australia offer patch sewing services. Prices vary depending on patch size and garment type.
How do you sew patches onto denim or jeans?
Denim works very well with sew on patches because the fabric is strong enough to support repeated stitching. Denim needles and polyester thread are usually recommended. Decorative patches are stitched onto the outside of jeans or jackets, while repair patches can be sewn onto the inside for reinforcement.
Where can I buy sew on patches in Australia?
Ready-made sew on patches are available from craft stores, online marketplaces, and clothing accessory retailers across Australia. Custom sew on patches can also be ordered from patch manufacturers that create embroidered, woven, chenille, leather, or PVC designs for businesses, clubs, schools, and personal use.
What needle should I use for sewing on patches?
The best needle depends on the fabric:
- Denim and canvas usually require a 90/14 denim needle.
- Cotton and polyester fabrics work well with an 80/12 universal needle.
- Leather requires a 90/14 or 100/16 leather needle.
- Thin nylon materials often need smaller sharp needles such as 70/10.
Can sew on patches be added to hats or caps?
Yes. Sew on patches are commonly applied to baseball caps, beanies, and trucker hats. Structured hats are usually easier to sew by hand or with a sewing machine free arm. Flat embroidered patches generally sit better on caps than thick 3D patches.
How can I make my own custom sew on patches?
You can create DIY patches using felt, fabric, embroidery thread, and fabric backing. For more professional results, many companies in Australia produce custom sew on patches based on logos, artwork, or text designs.
What thread works best for sew on patches?
Polyester thread is usually the best option because it is durable, colourfast, and resistant to moisture. Heavy-duty bonded nylon thread is often used for leather, biker gear, and outdoor applications.
Where should patches go on a letterman jacket?
Traditionally, the main varsity letter is placed on the left chest, achievement patches go on the sleeves, and larger decorative patches are centred on the back. Placement can vary depending on school, club, or personal style preferences.
How do you sew on scout patches?
Scout patches are usually stitched onto sleeves, shirts, or sashes using simple hand stitches like whip stitching or running stitches. Many families temporarily iron the patches first before reinforcing them with stitching.
Can patches be sewn onto backpacks?
Yes. Sewing patches onto backpacks is often more reliable than ironing because most backpacks are made from synthetic materials like nylon or polyester. Hand stitching gives better control around thick seams and structured areas.
Are there businesses in Australia that sew patches onto hats?
Yes. Many embroidery shops and uniform specialists throughout Australia provide patch application services for hats and caps, including custom placement and stitching options.
Your Sew On Patch Journey Starts Here
Sew on patches are one of the most enduring forms of personalisation and branding, durable, visually striking, and meaningful in a way that printed graphics simply aren’t. Whether you’re patching a pair of beloved jeans, outfitting a footy club, gearing up a work crew, or building a biker vest that tells your story, the fundamentals are the same: choose the right patch type, use the right needle and thread for your fabric, and take your time with positioning and stitching.
For ready-made options, Australian craft stores and online marketplaces have you covered for stock designs. For anything that needs to represent your brand, team, or identity, custom sew on patches are the answer, and that’s where Custom Patches Australia comes in.